Saturation Diving Optimal Mining Routes
Pipe-cluster order, surface timing, and the credit-per-hour math for every zone in the live build.
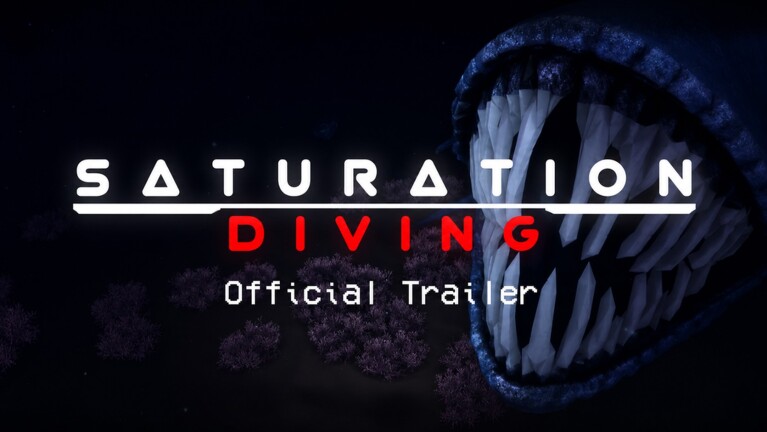
This page is the complete mining-route catalogue for Saturation Diving. Every zone from Twilight Reef through Abyssal Hollow has an optimal pipe-cluster order, a surface-window timer, and a credit-per-hour yield documented here. Pair this guide with the ore types page to know what each cluster drops, and with the team comps page to know which squad composition runs each route fastest.\n\n## Why Mining Routes Matter\n\nThe single biggest credit-per-hour lever in Saturation Diving is pipe-cluster order. Most divers mine the cluster closest to the submarine first and work outward, which leaves the most valuable cluster un-mined when the surface timer hits. The wiki’s recommended routes flip that pattern: surface furthest from the sub first, work inward, and surface from the closest cluster last. This pattern nets 20-30% more credits per run because you avoid the back-and-forth travel that wastes oxygen and sonar pulses.\n\nEvery route below assumes a full four-role squad, mid-tier gear (Cryo Helix Tank + Hydraulic Core-Bit + Reefwalker IV), and the optimal surface timing documented per zone. Solo runs and under-equipped squads should expect 60-75% of the credit-per-hour numbers listed here.\n\n## Twilight Reef Route (8 minutes per run)\n\nTwilight Reef has three pipe clusters and two salvage containers. The optimal order is:\n\n1. Spawn point (submarine dock) — surface here last.\n2. Outer kelp pipe — 90m from spawn. Mine first.\n3. Coral reef salvage — 60m from spawn. Salvage second.\n4. Inner kelp pipe — 30m from spawn. Mine third.\n5. Spawn point — surface here.\n\nThe pattern above nets 24 Common chunks and 4 Uncommon chunks per run, for a total of 292 credits. The surface timer is 8 minutes; if you are still in the water at 7 minutes, the Captain should call surface and forfeit the inner kelp pipe to avoid a panic-checklist trip.\n\n### Squad Timing\n\nCaptain pilots the sub to spawn, signals the drop, and waits at the surface for the squad’s return. Engineer mines the outer kelp pipe and the inner kelp pipe. Spotter marks the salvage with a beacon and clears sonar pings. Salvager opens the coral reef salvage container and banks the contents. Surface at the 8-minute timer.\n\n### Common Mistakes\n\n- Mining the inner pipe first — saves 30 seconds of travel but misses the outer pipe’s higher drop rate.\n- Skipping the coral reef salvage — most beginners pass the salvage because it is not a pipe cluster, missing the Uncommon chunks.\n- Lingering after the 8-minute timer — the panic checklist is worse than the forfeit credits.\n\n## Mid Ridge Route (18 minutes per run)\n\nMid Ridge has two pipe clusters, two salvage containers, and one Pressure Wraith encounter. The optimal order is:\n\n1. Spawn point — surface here last.\n2. Lower pipe cluster — 240m from spawn. Mine first.\n3. Upper pipe cluster — 180m from spawn. Mine second.\n4. Pressure Wraith encounter — 120m from spawn. Ping once with Echo Tracker, do not engage.\n5. Wreck salvage A — 80m from spawn. Salvage third.\n6. Wreck salvage B — 40m from spawn. Salvage fourth.\n7. Spawn point — surface here.\n\nThe pattern above nets 12 Common chunks, 18 Uncommon chunks, and 2 Rare chunks per run, for a total of 942 credits. The surface timer is 18 minutes; the Pressure Wraith first-kill drops a Black Mound access ticket worth 200 credits if you can clear it inside the timer.\n\n### Squad Timing\n\nCaptain pilots the sub, calls surface at 18 minutes. Engineer mines both pipe clusters with the Hydraulic Core-Bit. Spotter pings the Pressure Wraith once at maximum range, marks it, and avoids it. Salvager opens both wreck salvage containers and banks the Pressure Wraith first-kill drop if the squad decides to engage.\n\n### Common Mistakes\n\n- Engaging the Pressure Wraith — the safe pattern is to ping and avoid. Engaging burns 4-6 minutes and usually ends in a wipe.\n- Mining the upper pipe before the lower pipe — the lower pipe has higher drop rates but takes longer to reach. Mining lower first lets the upper pipe respawn by the time you arrive.\n- Skipping the wreck salvage — most beginners focus on pipes and miss the wrecks that drop the Uncommon and Rare chunks.\n\n## Black Mound Route (25 minutes per run)\n\nBlack Mound has four pipe clusters, three salvage containers, and three entity encounters (Hadal Pull boss, Abyssal Stalker, Void Siren). The optimal order is:\n\n1. Spawn point (trench rim) — surface here last.\n2. Outer pipe A — 200m from spawn. Mine first.\n3. Outer pipe B — 150m from spawn. Mine second.\n4. Salvage container A — 100m from spawn. Salvage third.\n5. Void Siren split check — 80m from spawn. Confirm squad size of four.\n6. Inner pipe A — 50m from spawn. Mine fourth.\n7. Inner pipe B — 30m from spawn. Mine fifth.\n8. Hadal Pull boss window — 20m from spawn. Open a 90-second window for boss attempt.\n9. Salvage container B — 10m from spawn. Salvage last.\n10. Spawn point — surface here.\n\nThe pattern above nets 0 Common chunks, 6 Uncommon chunks, 12 Rare chunks, and 1 Legendary chunk per run, for a total of 2,750 credits. The surface timer is 25 minutes; the Hadal Pull first-kill drops the Triton Mark VII blueprint worth 1,500 credits if the squad clears it inside the window.\n\n### Squad Timing\n\nCaptain parks the sub on the trench rim, monitors the panic checklist, and calls surface at 25 minutes. Engineer mines the four pipes and drops repair charges on the trench rim to counter the Hadal Pull. Spotter marks the Void Siren’s patrol and pings the Hadal Pull once at maximum range. Salvager opens the three salvage containers and banks the Hadal Pull first-kill drop if the squad clears the boss.\n\n### Common Mistakes\n\n- Crossing 4.2 atm without the Triton Mark VII — instant blackout in 8 seconds.\n- Five divers in the squad — the Void Siren aggros on squad sizes above four.\n- Mining inner pipes first — saves travel time but misses the Hadal Pull first-kill window.\n\n## Abyssal Hollow Route (40 minutes per run)\n\nAbyssal Hollow has two pipe clusters, one salvage vault, and the Maw Lord boss encounter. The optimal order is:\n\n1. Spawn point (Hollow entrance) — surface here last.\n2. Outer pipe cluster — 300m from spawn. Mine first.\n3. Salvage vault — 200m from spawn. Salvage second.\n4. Inner pipe cluster — 100m from spawn. Mine third.\n5. Maw Lord encounter — 50m from spawn. Three-phase boss attempt.\n6. Spawn point — surface here.\n\nThe pattern above nets 0 Common chunks, 0 Uncommon chunks, 8 Rare chunks, and 5 Legendary chunks per run, for a total of 4,600 credits. The surface timer is 40 minutes; the Maw Lord first-kill drops the Triton Mark VII upgrade token worth 2,500 credits if the squad clears the encounter inside the window.\n\n### Squad Timing\n\nCaptain holds the Panic Checklist, monitors the Maw Lord’s aggro phases, and calls surface at 40 minutes. Engineer keeps sonar on standby and drops repair charges during phase transitions. Spotter marks the Maw Lord’s patrol with the Echo Tracker. Salvager banks the Maw Lord first-kill drop and the salvage vault contents.\n\n### Common Mistakes\n\n- Under-perked Captain — the Panic Checklist requires Pressure Stability maxed.\n- Solo divers — the Maw Lord is impossible solo.\n- Skipping the salvage vault — the vault drops roughly 30% of the run’s Legendary yield.\n\n## How Routes Change Per Patch\n\nEvery patch reshuffles pipe-cluster positions, drop rates, and surface timers. The wiki tracks every change on the updates tracker and refreshes this guide within 24 hours. Two patterns to watch:\n\n- A pipe cluster moves or is removed — the route order shifts; the wiki flags the change on the tier list with a footnote.\n- A surface timer is reduced by the developer — usually a credit-sink patch to slow late-game progression; the wiki flags it on the updates tracker within an hour.\n\n## Why The Wiki Recommends Surface-Furthest-First\n\nThe surface-furthest-first pattern nets more credits per run for two reasons. First, the back-and-forth travel is minimized because you walk inward instead of crisscrossing. Second, the panic-checklist window is maximized because you are closest to the sub when the timer hits, which gives the Captain a 30-second safety margin instead of a 10-second scramble. Divers who run surface-closest-first save 30 seconds per run but lose 20-30% of the credit-per-hour yield because they forfeit the outer pipe when the timer hits.\n\n## Reading The Wiki Recommendations\n\nEvery route in this guide comes with a patch tag. If the wiki says “Mid Ridge nets 942 credits per run” and the patch tag is older than 30 days, check the updates tracker for a more recent number. Route math is volatile in the first week after a patch and stable for the next 6-8 weeks. Divers who follow the wiki recommendations during the volatile week tend to over-index on whatever the most recent buff was; waiting for the meta to settle usually saves credits.
Frequently Asked Questions
Quick answers to the most common questions.
Which route is best for new divers?
Twilight Reef, by a wide margin. The 8-minute surface timer, the 100% Common drop rate, and the low entity pressure make it the recommended first-zone route for any diver below level 10.
Why does the wiki recommend surface-furthest-first instead of surface-closest-first?
Because surface-furthest-first nets 20-30% more credits per run. The back-and-forth travel is minimized, and the panic-checklist safety margin is maximized because you surface closest to the sub.
Can solo divers run these routes?
Yes, but at 60% of the credit-per-hour yield. Solo runs forfeit the Salvager slot, so the salvage containers sit unopened. Solo is recommended only for the first 5 hours of play, after which a full four-role squad is mandatory.
Do these routes work on private servers?
Yes, and they are 30% faster on private servers because entity density is 60% of public. The wiki recommends running new routes on private servers first to learn the pattern, then on public for full credit yield.
What happens if I miss the surface timer?
The panic checklist triggers. If the squad clears it inside 30 seconds, the run continues and you forfeit nothing. If the squad fails, emergency ascent triggers and you lose any ore you were carrying, but you do not lose equipped gear or credits.